Monday, June 20, 2005

Porch Railing Almost Complete (photos)

I wasn't sure what I was getting into when I decided to "peg" every balluster to the railing, but when I tried to conceive of how the railing should look, it was the only solution that I could see. As it turns out, once the jigs were up and running I went from making 2 sections in two days to 5 in one day to 6 on the last day. Pounding the hundreds of pegs in proved to be almost a sublime pleasure. A small boy will spend hours pounding play nails into a workset or shapes through openings in a toy, thus it should not surprising that an adult boy would be able to do the same.


Railing almost complete.


Pegging detail.


Ballusters all in a row. Only the top plate is missing.

Saturday, June 11, 2005

My First Shower (photos)

Last night, for the first time in two years in my own domicile, I took a hot, pressurized shower in a clean well lighted bathroom. It was made the more thrilling being illicit (not supposed to be "living" there until occupancy) and that the bathroom is lacking a door at this moment. Nonetheless, everything worked flawlessly. The water, coming as it does from the sky and not the ground, was soft and clear. Little droplets glistened as they beaded up nicely on the gleaming chrome and the fresh tile.


Me taking my first real shower at home in two years. You were expecting more?

Railing (photos)

Much to my own surprise, this part is turning out to be one of the most rewarding elements of the project. I hadn't designed a railing system for the porch, but I knew I didn't like what I'd seen in magazines and books. The requirements are also pretty strict. The railing must be at least 36" high with no more than a 4" gap between ballusters (vertical rails). Inspired by the pegged joinery inside the house, I determined to dowel peg the railing. I ordered the lumber, but I was a bit unsure about how much time it would take. I set up a couple of jigs to keep things reasonably square, and as the pictures I hope show, I'm very pleased with the result. I did the shortest rail section first as a test.


This crude jig makes a hole in the top of the balluster


This form, ensures the railing comes out square.


The finished (sample) railing. The 3/8" maple pegs will sit proud of the rails.
The pegs are unglued and only 8 screws are used to secure it to the posts.

There will be a top plate screwed in above. Something to set a cool drink on.

Four feet of railing done. Only 136 to go.

Friday, June 10, 2005

Bathroom Done (photos)

The bathroom is complete. It is hard to photograph being about the minimum possible size for a bathroom with a tub at 5' x 7'. Here is the ingredients list:

  • Matte white subway tile from Pratt and Larson, Portland, Oregon.
  • Tub is a vintage, 1930s cast iron built-in. $75 used from the ReBuilding Center, Portland, Oregon
  • Wall lamps circa 1930 from Hippo's, Portland, Oregon. $100 the pair.
  • Mirror frame is an old window found in the woods on the property. $9 for the mirror glass.
  • Sink was found on the property. Delta faucet about $90 at Home Depot or Lowe's.
  • Tile floor is my own pattern. Not as hard as it looks. The tiles come in 1' x 2' sheets in black or white, and the small area (about 20 square feet) made it more affordable. Again from Pratt and Larson. A shop well worth visiting.
  • Toilet is a Kohler, Serif model. About $140 at Home Depot.


Vintage $75 tub gets a new home..


In the mirror you can see reflected theedge of the 22" Sun Tunnel
and the light in the shower/tub area.
The light works, but I was still experimenting with bulb power and type.


Floor pattern of my own making. Turns out the tub edge is curved making cutting of
all those individual tiles the most difficult part.
Otherwise the floor was easier than any of the subway tiles.

Sink and Ceiling (photos)

Some photos of progress on the interior up to the time of this post.


Looking at the north half of the house (minus the den to the right). From left to right:
front hall, bathroom, kitchen sink area, kitchen. All tiled.


The front hall and door before the ceiling went in.


5" cedar tongue-and-groove (T&G), finished
with linseed oil, drying on the porch.


Looking at the hallway from the front hall with the ceiling installed.
The black "box" on the far wall is the exhaust duct for the
wood buring cookstove that will be moved into place soon.


The kitchen sink is cast iron and was found in the old garage. It
has a few dings, but is very servicable. Open shelving will be
installed over it as drying racks and storage for just washed items.
The sink is located close to the water heater (20 gallon marine
type in the ceiling/attic area) and in a nook so dirty dishes can
remain somewhat hidden from view.

Porch Progress (photos)

Here are a series of pictures taken in May till this posting capturing the tremendous progress on the deck. The deck is made from "rough," locally milled cedar (rough means that a 2x4 is actually 2" x 4" not 1-1/2 x 3-1/2).


Jordan drives in one of the over 500, 4" stainless steel deck screws.


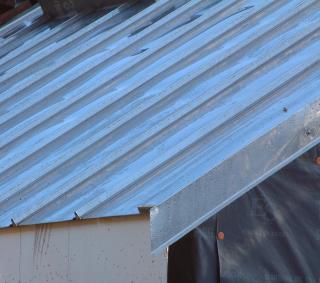
The roof gleams.


The porch roofline becomes visible.


The rafters are the same 7 in 12 pitch as the roof.


The house from the west.


The Zoeller's make a great team.


Plumb, square and level. Raw cedar and blue sky.

Thursday, June 09, 2005

Front Hall Done (photos)

The front hall is the first room to be completed. The room is designed to be an airlock between the front door and the rest of the house where wet, muddy clothing can be removed. The tile is one of the few overseas imported elements in the house. They are made in Italy. It is a pattern of 5 colors (of which I used 4), 6x6" with distressed edges and uneven texture like slate. The four colors are: Asia Jaipur Blu (grayish), Asia Rajastan Verde (more brownish), Asia Bangalore Nero (ranges from caramel swirl to all black) and Asia Madras Rosso (which is red).


Sunlight from the front door windows flares on the front hall floor.

Sunday, April 03, 2005

Porch (photos)


Front door.


Stacks of locally milled cedar.


Fort Vesper.


It's all downhill from here.

Saturday, March 26, 2005

Energize!

The milestones are coming fast and furious. Today I hooked up power to the house, and nothing blew up, no breakers tripped and the lights in the basement came on.

I already had electricity to the little shed I built to house the solar equipment, and I had burried the 3" conduit the 100+ feet to the house. All I really needed was the wire to connect it. 200 amp service wire is big. Wire sizes get bigger the smaller the number. But once the wire got to zero instead of going negative, they just add zeros. Thus 0, 00, 000, 0000 abbreviated 1/0 2/0, 3/0, 4/0 and pronounced one-ought, two-ought, three-ought, four-ought. I needed a 3-wire set of either 2/0-2/0-1/0 copper ($450) or 4/0-4/0-2/0 aluminum ($150).

I hadn't decided whether to splurge for the copper and I was talking it over with Jordan last week when my neighbor Steve showed up. By his own admission he knows nothing about electrical wiring, but he heard us talking about it and mentioned that there was a coil of "really big wire" laying in the yard. I said it had to be really big, and he said it was, so I followed him over to take a look. Under a piece of plywood sitting in the grass was indeed a large coil of wire. I looked over the casing. 4/0-4./0-2/0 aluminum. It was the right stuff, but was it long enough. We uncoiled it in the driveway. I needed 128 feet. I paced it off. 120 feet. So close. I knew my calculation was generous as I had left an ample amount so as not to come up short.

I told Steve that it was so close the only way to find out if it was going to work was to try it. He agreed to help and we coiled up the monster and tossed it in the back of my truck. I had already pulled the leader rope through the conduit. We taped and tied the rope to one end. Steve went down the hill to pull. I stood at the top and pushed the cable in sections, pausing to apply a generous quantity of special wire lube. Steve didn't have to pull much as the cable slid down easily and once some weight was in the conduit, gravity assisted.

About half way down the cable became hopelessly jammed on something and we had to pull the whole thing up. This took both of us as the now slick wire was difficult to grasp. LIke pulling a 50 foot eel out of a hole. We guessed the problem was that one of the three ends stuck out a bit. We cut it off with a hacksaw (this wire is about 1/2" thick. Too thick for normal wire cutters). We also taped half a plastic soda bottle over the top to make it run smoothely. Back in it went.

This time we had no problems and within a few minutes the other end popped out at the bottom of the hill. It still seemed close. After feeding it through the wall at both ends it was clear it was long enough with only perhaps 3 feet to spare. "Sold" I told Steve.

Today the lights came on. Sadly the roof still leaks. The saga continues.

Thursday, March 17, 2005

Roof Chimes Not Leaks

We tried another strategy for the leaky, high-tech vent and chimney seals. We surmised that water must be backing up under the standing seam of the adjacent panel and so caulked the entire seam up to the ridge. This was done several weaks ago, but with no significant rain in months, there has been no real-world testing.

But on the 16th and 17th we had a small amount of rain. Truth to tell I was affraid to look, but lo and behold, not a drop. It will take passing through a major storm till I'm really confident, but we seem to have licked this one.

Meanwhile I was able to create a makeshift hook-up my 300 gallon holding tank to the gutter. In the little bit of rain collected a week ago, the roof yielded 275 gallons. In the rain we had over the two days this week 200 gallons was collected, even though the downspout detached one of those days. The collected water has been used to test the DWV and mix the concrete for the porch footings.

An unexpected benefit of the roof design is that when it rains the gutter acts as a water chime.

Monday, March 07, 2005

Passing Muster

Today was inspection day, and I passed with flying colors. Because it is such a long trek to get to my house from Astoria, the county seat, I try to group the inspections together. On the list today were: drain-waste-vent (DWV) final, plumbing and electrical rough-in, and the footings for the porch posts prior to pouring concrete. In essence I was asking to be able to cover up the interior walls and proceed to finishing. In fact, I had already covered half of all the interior walls (the backs were visible) and, of course, because of the construction, the exterior walls arrive from the factory already sealed.

DWV
Code requires that there be the equivalent of a 4" vent pipe of venting total for the house. In most houses with two or three bathrooms, and perhaps other venting needs, this is accomplished by a collection of vents. But in my house, with only one bath and everything deliberately grouped close together, as in homes of yore, I have a full 4" stack running out of the house. The options for testing its soundness is to pressurize it with air or to simply fill it full of water. To keep the water from running out into the septic tank there is an inflatable plug that can be inserted into the system (not unlike balloon angioplasty) and expanded with air to hold back the water.

I bought one of these and stuffed it into the cleanout in the basement, pushing it up the pipe and inflating it with a bicycle pump. We filled the stack, about 20 feet high, and all the branch arms with water. As the water came gurgling in the pressure built on the fittings. As it filled to the level of the cleanouts, a few drips from the threaded fittings began to drip. Not crucial, but I decided that they should be refitted with some plumber's goo to ensure there were no issues. This meant draining the system. I took the bladder inflation tube and pressed the little pin of the schrader valve (like on a bicycle tire) and let the air escape. Pssssst WHOOOSH, water burst out of the opening in fire hydrant volumes, jetting up to the ceiling and soaking everything in its path. Jordan, acting swiftly, placed his two hands over the outlet only to direct the flow down onto his pants and boots. In a flash the whole episode was over and we laughed as water dripped down into the pool on the floor, making the dark, back half of the basement even more cave-like. Upon inspection it was clear that the plug had been driven down into the lower pipe, past the cleanout and thus effectively blocked the flowing water and directing it all into the pipe.

The Color of Electricity
There are two bundles of 11 wires each (5 pairs and 1 ground) that run in conduit up from the basement to the attic space. There the emerge from a junction box as Romex and spill down into the walls from above. I used up a full 500 foot roll of white (neutral) and black (hot) wiring just doing the basement, but when I went to Home Depot to buy more they were out of white. Instead I bought a very pale yellow wire. So pale in fact that it could be mistaken for old white wire. In anycase, I was sure that it could be "recolored" by applying a piece of white tape at each end.

Matt, my inspector, took one look at them and declared them "conductor non grata." It seems that only huge wire, larger than number 6, can be relabled. For size six and smaller the neutral must be white. What's really odd is that the off-white, pale yellow wire, which I think could easily be mistaken for neutral can be used for hot! The mysteries of the building code.

Plumbing
I've been living out of 5-gallon water containers again. The pump I had been using at the trailer to give me running water at the kitchen sink was called into service to pressurize the new house for testing. I simply put one end of the pump into a bucket of water and the other temporarily connected to the PEX lines. I had one leak and one hot-cold mixup, but otherwise everything worked splendidly. It was great to see water running into the tub. Ah, I can almost feel the warm water of a future bath.

Matt quickly approved the footings, which are built more like those needed for a highway overpass, and was about to leave when I offered him the spectacle of draining the DWV. He had remarked at the weight that my oversized lines were carrying, and wasn't going to miss this. This time I had drilled holes in a 4" cleanout plug to minimize any backwash. Again, and for the last time, I grabbed the pressure hose. This time i was determined to let only the tiniest puffs of air out until water could only seep around the side, and so let it gently drip out over time. Psst. Nothing. Psst. Nothing. Psst. Nothing. Psst - WHOOOSH. The cap didn't block the outflow of water, but instead concentrated it into a energetic jet of water that streamed out through the center opening. Everthing was soaking again, but at least for the last time. And more importantly I had a good laugh with Matt. And in the end humoring one's inspector is more valuable than a wet basement floor.


Sunday, February 20, 2005

Gutters (photos)

The first section of gutter is up. Like the roof it is stainless steel. I first saw this half-round design with cast clips on youth hostel in California. I've wanted to use it ever since.


The half clips blend well and maintain the clean lines of the rest of the sturcture.


The half-round shape means plenty of fluid capicity with no place for debris to accumulate.
The clips are aluminum and are riveted in place.


Hosed (photo)

The pumps and filters are all installed. This photo doesn't quite capture how spiffy the whole thing looks.


From right to left:

1. Water comes in from a 300 gallon holding tank that catches water off the roof. It is filtered by a 5 micron filter.

2. The water is then pumped back out and uphill to 3000 gallons of storage by a special, low-power Dankoff Slow Pump.

3. Water returns from the tanks and goes through a 1 micron filter.

4. The water is pressurized for household use (ah, I can almost feel the rush of a real shower again), by a very cool Grundfos integrated pump and pressure tank.

5. Finally, the passes through the Trojan UV light to kill anything left in the water. The blue box is the controller for the UV light.


Tuesday, February 15, 2005

Liberation (photo)

I am not a mouse.

Before dawn, before the birds' song, before my first cup of coffee, I arose, donned my long underwear, thermal socks, and cashmere hat and exited my icy shack. Frost covered the windows, and the ground yielded underfoot like chilled cookie dough. As I traversed the 200-yard walk down to my bogged-down tractor, I noted with satisfaction that the standing water had formed into tiny, frozen ponds.

The weather man had been right for a change. Cold and clear. The mercury substitute standing at just above the 20-degree mark. Everything had a light coating of frost; preparing to shimmer the moment the sun crested the low eastern hills.


I climbed aboard and turned the key to the first position. The orange glow plug light came on and I paused for it to extinguish, indicating the machine, Tommy Mow, was ready to start. All was still. A commercial jet, chased by its contrail, made its silent, lumbering way across the sky. I turned the key full to the right and the engine cranked and caught immediately. Like an aging smoker Tommy expelled a few belches of black gunk and then ran smoothly. This time I checked carefully that everything was fully retracted. I grabbed for the seatbelt, but it was frozen to the chassis.

I revved him up to 2500 rpm, and put my foot on the accelerater. Confident, sure-footed and purposeful, Tommy rose up out of his lumber reinforced mud hole, moved forward to a small patch of high ground, obidiently turned to the right, crossed a narrow rivulet and was free. Like a returning comet we swung around the burn pile at the bottom of the garden, and headed home.

The sun rose, the birds sang our praises and everything shimmered.

Sunday, February 13, 2005

Mud Wrestling (photos)

It has been an abnormally dry year. While California and British Columbia got soaked, Oregon remained sunny and warm. But on the east side of my new house a river runs through it.

On Friday afternoon, after the work crew had finished prep work on the porch footings, I decided I needed to really get after digging the new footing drain. Now that the porch footings were located I could see exactly where the new drain line needed to go to avoid them.

I wheeled the tractor into place and started digging with the backhoe. It was mucky, but I was pointed downhill and I figured I could my escape just by coasting down to the bottom of the yard, making a right at the burn pile and I then would be on relatively dry ground again.

After repositioning the tractor several times to dig the 30 foot long trench, I was done. I mounted the drivers seat, reached back to pull on the two levers that retract the hydraulic, stabilizing outrigger arms, turned my head south and started to exit the bog. After 10 feet I came to a stop and began to sink. I looked back, and the outrigger, on the opposite side that I had leaned to, had failed to retract. It had been stuck by the suction power of the clay, and dragged through the mud like an anchor. Whether or not this was the actual cause of my getting stuck, I will never know.


I tried using the bucket to raise the front wheels, I rocked it back and forth, I checked that I was in four-wheel drive. But the tractor just kept sinking, eventually settling at the axles.


Making my own stream

Where my tracks had been, water now flowed freely down and pooled under the tractor. It was getting dark. I decided to abandon the effort that evening. I was gone the next day, but swung into the driveway in the early evening upon my return just to make sure it hadn't sunk any farther. It had not.


Animation: Raising the Deere

Today, I went out to raise the Deere. Using the hydraulic outriggers, the bucket and lots of large lumber I was able to raise it up. My plan now is to wait till Tuesday morning when it is supposed to be below freezing overnight and hope that hardens the ground a little. I have also dug a channel in the mud above the backhoe that is diverting the water around the tractor. I could have a neighbor pull me out with his own tractor, but where's the challenge in that? Plus, instead of the ignomy of getting my tractor stuck in the mud and having to be towed, I will be the guy who managed to get a tractor stuck in the mud up to the driver's seat (all tall tales grow taller) using nothing more than his wits and his Leatherman. Am a man or am I a mouse? We will find out in short order.


Monday, February 07, 2005

Let There Be Light (Photos)

I arrived back home from a trip to town just after noon to find the first, upper story, tall window had been installed. I didn't really want to inquire how. The windows are 3 feet x 6 feet, hefty and delicate. Nonetheless there they were. The first one was in and the opening for the second one, shrouded since September, was uncovered. The interior space came to life with the kind of light and joy that only the sun and the sky can achieve. The rays of the sun sped past the openings and drenched the upper back wall exactly as planned. These valuable photons will be collected during fall, spring and winter by cementitious panels that are designed to radiate the energy back at night and otherwise moderate the temperature fluctuations in the house.

As I stood outside looking up at the windows a bald eagle flew from left to right across the roof. A sign of good fortune.


Front Door.


Front Door.


Ladies and Gentlemen, The Doors! (Photos)

The front and back doors are in. I have a key to the house. Adding some foam around them and sealing the windows make it start to really feel like home.

The doors were made by Mountain View Window and Door of Scappoose, Oregon. I provided the material of 2"-thick, salvaged fir planks from the old shop. The interior doors are also made from salvaged fir, but have panels of solid cedar from the shop exterior. The wood is probably 50-years old. Even so, it's not old-growth. It's simply finished with teak oil.


Front Door.


Back Door

The door hardware is from Emtek and is sandblasted brass. The doors have an easy mass to them. The design is a simple Shaker-inspired pattern of a cross. The doors have numerous pits, bores, channels and from bugs. There are nail holes and the resulting nail stains. There are places that one can see tiny rays of light coming right through the door. They are quite dramatic.

It Leaks, But It's Still Stunning (Photos)

The roof was completed last week under dry weather. Since then Mother Nature has mocked our puny attempts at waterproofing. What is stainless steel and silicone compared to a tortoise shell or the fur of an otter? That's it, a fur roof!


Jordan attaches the final piece of ridge cap.


Finished Roof


The roof leaks like water torture, in maddening, persistent drips, around the vent and chimney penetrations. The four skylights that were "flashed" the old-fashioned way are gloriously dry, and I expect will be so for a hundred years. The other two holes were flashed using the latest, most modern, installed-from-the-top design. The high-temperature silicone for the chimney is spatula-red (apparently this stuff only comes in one color no matter what the use) and has an astounding temperature range of -100 to +450. The ads say, "... lasts for years but installs in minutes." We have concluded that the old ones have to be removed, which means removing part of the chimney, the roof thuroughly cleaned in that spot and a new, square one (different brand) installed.


The rather unusual "turnbuckle" detail that will support the gutter.


View from the east.

Wednesday, February 02, 2005

Red Letter Day

I don't have time to write much about it now, nor time to post pictures, but today two great things happened:
  • The roof is finally complete.
  • The front and back doors are in.
The last piece of the roof was screwed into place this morning. By noon my doors were on. Now I have a key to the new place. The weather continues to be suspiciously dry and clear, making the house seem even more inviting.

Thursday, January 27, 2005

Human Error

The four water tanks arrived last week, but I had to send 3 of them back. They were 1100 gallons instead of the 1000 gallon tanks I'd ordered. Not a big deal except that the two designs are radically different, the former being short and squat and the latter talll and skinny. The shed I'd built for the tanks accommodates only the taller skinner ones.

Another error, from a different vendor, resulted in several metal fittings ordered galvanized being delivered with out the specified coating. In addition 30 custom brackets were the wrong model completely.

I mention both of these because they were both due to human error on the part of the vendor. Errors that could have been avoided if they would allow ordering through their websites. Or at the very least any error would have been my own. This seems important when in both cases any meager margins for the products were consumed and then some by the errors.

In the case of the tanks, it's a bit more understantable that there is no direct ordering as the logistics of shipping are involved, but in the other case it's harder to understand. The company is Simpson StrongTie and though one has to look up the model and download the custom order form from their website, one is forced to go through a dealer to order them. This seems a complete and unnecessary waste.

On the other hand how far will automation take us? Are these really incompetent humans that can do better or at least not representative of most humans or is some level of incompetence a human trait that we should recognize, and if not celebrate, at least abide? If in order to satisfy my desire to never be inconvenienced in the slightest way the human element must be removed is my being invonvenienced really the most important thing?


The Roof is On

I would say that my mood is bouyant. Good things are happening daily, nay hourly. Most importantly the days are getting longer, warmer, and drier. If one were going to build a house in the winter in coastal Oregon, this was the year to do it. But even so December and January were mentally challenging. But now it's just a delight to go down and work on the house.

The roof is on. Today the last roof panel was finally put into place. There is still the ridge cap to put on (not an easy task) and one that it is hoped will remove the last two drips of rain in the house (around the vent and chimney pipe).

I calculate that on or about February 8th the sun will once again strike the roof. I expect that the effect will be blinding. Pictures soon.

The doors are here. Last week we went and picked up all 6 of them. The two exterior doors are oiled up and ready to be installed. Pictures soon.

I've been working on the electrical system, and making terrific progress. 400 feet of metal conduit had to be run in the basement and that is nearly complete. Soon I will actually hook it up to the panels.

I am targeting April for move-in.

Friday, January 07, 2005

Still Two Panels Shy of a Roof

Nothing happened on the house between December 20th and today, January 7. It has been dark, wet and near freezing. The house, not being fully enclosed is not the most pleasant place to work. I will confess to some post-holiday reluctance to getting going again. Having spent the holiday in the warm bossom of my parent's home, with lots of hot water, mounds of food, and nothing really to do, I found my return to my dank, fetid, icy hovel of a temporary residence a bit of a shock.

Turning the heat off overnight has meant the house descending to the 45 degree level by morning. I find it is awfully hard to drag my ass out of bed into such a chill.

But today I sucked it up, went out and wired the bathroom. Still, I only worked until 3:30 today when my toes were frozen and my fingertips numb. The forecast is for the cold snap to end after next week. Even so, the entire winter has been relatively dry.

The pumps, water tanks, and filtration equipment have all been ordered from afar and are en route. The doors will be picked up and the exterior ones installed this month. Deck/porch lumber has been ordered and the deck may be truly started this month as well.

I'm still two panels short of a roof. Some say this is also describes me personally. The chimney and vent still leak, but the roofers are convinced that it is water running down from the still open ridge. So the roof will be sealed up in the next week or so, and if it still leaks, then it will have to be reworked in the summer.

The days are getting mercifully longer and in another 45 days we will start seeing signs of spring. I look forward to it more than I do Christmas.


Friday, December 10, 2004

Two Drops Forward, One Drop Back

The roof is more than 3/4 complete, but it leaks in four places. One is the vent flashing. This should be fixed by installing a new one.


The second one is in the skylight that has been flashed, but the roofing above it has not been installed. Thus all the water from 66 square feet of roof runs right under the flashing. Still, it didn’t leak when it had only "paper" flashing. This should be fixed when the additional roof pieces go on.

Third is in the living room above where the aforementioned roofing is to be installed. Should likewise be fixed. Still, it’s incredible that the roof is leaking at all.

Fourth, and the most disturbing one, is in the living room in an already roofed section. This area has never leaked before. The only source for water has to be the very upper edge of the roof that won’t get capped until the whole thing is on. Let’s hope so. I don’t really want to contemplate the alternatives.

The roof is made up of only 8 giant, 10" thick panels. The seams have been glued, and foamed. Then they were foamed again, once in place, and self-adhesive flashing was laid over all the seams (only 4 seams). Atop all this is a 5/8" layer of plywood that is offset to every seam, and is glued and screwed in place. Over all of this is a layer of Tri-Flex 30 roofing "paper". A tough, hurricane rated, polyethyline roofing material. The curbs for the skylights is equally impressivelly flashed. Still...

Never underestimate the persistence of water.

Friday, December 03, 2004

Schedule 40

I loathe days like today. I spent it driving a hundred miles to make 3 stops. Worse than this, I was under a tight deadline to get to my last stop before they closed at 4:30pm. This was necessitated for wont of a vent pipe. The two feet of 4" vent pipe that will stick up above the roof. Often this is left as the 4" of black ABS, painted or covered by some metal roof jack. In my case this was to be, like everything else, stainless steel.

The Zs had volunteered to come up with a piece through their contacts, but suddenly on Wednesday they realized that they were about to cover that area of the roof, and they had no solution. I was in Astoria all day Thursday, and they agreed to solve the problem that day. When I returned home, I swung into the new driveway in the darkness and directed my headlights onto the roof. Little or no progress and no vent tube.

Thus I found myself this morning having to come up with a piece of pipe. Being Friday it was important to get something that day in case our spate of rain-free weather continued. The gods were dangling the good weather in front of us, and we were blowing it. In these past 3 days the roof could have been virtually finished.

I turned to Northwest Metal Products again. They were as responsive as usual, but if we were going to do something with what was on hand, I would have use "schedule 40" stainless steel pipe. I have seen and used the term often, but like so many things in life that we are familiar with, in truth we have no clue what they mean. In this case schedule 40 is the common minimum standard for DWV pipe, for example.

What I had originally wanted was a very thin piece of tubing as a mere cosmetic cover to the pipe or even to couple to the system via what is called a "hubless" coupler. In either case I had in mind something maybe 1/32 of an inch thick. I learned that pipe is really only specified by its outer dimension. I then made the wrongheaded logical jump to conclude in my own mind that surely schedule 40 4" stainless steel pipe would naturally be much thinner than 4" plastic pipe. This notion is further obscured to the novice because schedule 40 pipe is routinely referred to as "thin wall" pipe in the industry even though ABS DWV pipe is 1/8" thick.

In any case, although a c-note to acquire, I ordered it under a bit of duress, and then fled my house to make my own schedule

Boy was I surprised when North West presented me with a nicely polished hunk of tubing weighing in at a good 20 pounds. Remember, it is only 2 feet long. Turns out that schedule 40 is exactly that, a schedule. It's not a formula or a chart, but a schedule where one must look up the material, and nominal diameter and with this determine what schedule pipe to choose to meet one's other requirements. Turns out I really wanted was schedule 10S or even 5S stainless tubing.

One end of my vent pipe is precisely cut at 30 degrees to match the slope of the roof, and northwest had polished it up quite nicely. It is really too beautiful to mount on the roof, and I'm considering keeping it in the living room as a monument to how even the best intentioned modest projects can turn to folly and excess.


Wednesday, December 01, 2004

Metallica (Photos)

The stainless steel roof is starting to take shape. Today was the first of a few forecast clear days. The Zs got their first skylight sealed up and it is a thing of beauty. Thanks to the custom made stainless "saddle" I had made and some different side flashing there are up to 4 layers of water proofing with no silicon or caulking of any kind. This is waterproofing the old fashioned way, that is not trying to block water with high-tech sealents, but giving the water an easier path to ground. About 1/3 of the roof is complete, but it was too late to take pictures of it so here are some from earlier in the day. Click on the thumbs for larger images.


Workers in the mist


Working from the inside out


This doesn't work when it's raining


Doesn't look different from the south


In Oregon you can't have enough roofs

Tuesday, November 23, 2004

Venting (Photo)

There are many things on this house that I'm doing for the first time. One of these is a complete drain-waste-vent (DWV). The drain-waste part isn't that difficult to understand conceptually. After all, as we all know shit flows downhill. But figuring out how to get the vents back to the main stack so that I didn't have to put another hole in the roof was a challenge.

I called for a preliminary inspection before I glued the whole thing together. Matt was nice enough to come out even though it's not routine to inspect unfinished work. He told me my "wet vent" plan wasn't going to fly even though my piping is all well oversized.

It is one of the advantages of a small house. Using the largest possible piping doesn't cost much when the run is only 7'.

I redid the venting, but I didn't like the result after I glued it up. 4" pipe turns out to be tricky because when it is dry-fit it will often not fully seat in the fitting. Even so, it's really hard to take apart. However, once glued, the unset glue acts like a lubricant letting the parts fully engage. Unfortunately this tight fit means that the dimensions shrink. It's easy to lose a half inch or more once the glue goes in. This caused me no end of problems.

Likewise getting all the angles right. It's not so easy in 3D. Understanding that a 45 degree angle pipe needs another 45 degrees to change direction to 90 degrees isn't hard. But what if that 45 degrees is dropping out of the cieling pointing NNE mating to a pipe running east with a 45 degree bend to the south but canted 45 degrees up? The best answer I found is to buy a whole lot of 22, 45, and 90 degree bends and return the ones you don't use.


My first DWV


The photo shows the completed and entire DWV for the house. The bath was deliberately backed up against the kitchen sink to minimize plumbing and to make the hot water run as short as possible.

I did have to redo the water closet (WC a.k.a. toilet, crapper, shitter, can, head, etc.) and sink portion for the reasons cited above and because I wasn't satisfied that it was an elegant enough solution.

Next hot and cold water.

Thursday, November 18, 2004

Solar Story

Part of the plan for the house is a small solar array (1500 W). You might think, as I did, that with the solar industry over 25 years old, that getting the exact product one wants would be easy. It is not. There are few vendors of small systems (sub 2500W) that will sell power back to the utility (grid-tie) and at the same time offer battery backup. I had placed an order for such a product from Xantrex (yet another Canadian company). The grid-tie part was to ship in August, but August brought only an announcement that they had decided not to make the product after all.

This left Outback Power Systems of Washington with the right products. They are a private and relatively new company. There website is horribly out of date, and they seem like the kind of garage company that could fold any minute.

I held off waiting to see if any new products or mergers would be announced. So yesterday I placed the order for an Outback system. I only need the inverter and some mounting equipment. I have had the solar panels for nearly two years now.


Night Shift

By 6pm it is pitch black outside. Clouds or mist routinely obscure the moon. It is dark, cold and quiet in the house. Through the plumbing that I'm working on I can hear the haunting drips in the septic tank. Like listening to the bowels of a cavern from its entrance. I have set a tarp out to collect rainwater and direct it into the empty tank. Even though the tank is concrete I got conflicting reports as to whether or not it would pop up out of the ground: a boat floating in a sea of mud. To be safe I'm directing water into the 1000 gallon tank.

Now that the house is essentially water tight, I thought I would be working late into the night on various aspects of the interior. This as proven not to be the case. By 7 or 8 pm I am done for the night. 500 watts of light (actually a 65W fluourescent) is just not enough to keep me from wanting to hibernate. By contrast, I could stay up to the wee hours working on this computer. When it comes to physical labor, I am definitely diurnal.


Saturday, November 13, 2004

First Light (Photos)

Seven of the eleven windows are now installed. Along with the four skylights, it makes the interior light and open even on a gray day. This is just as I expected based on my obseration that it's not so dark and gloomy even on a rainy day in Oregon, it's only dark and gloomy inside homes where the windows are small and/or shaded by deep eaves. Once the large clerestory windows go in, it should be even more compelling.


Work on the roof is paused while I have some custom made flashing made up for the skylights. The flashing that we received from the metal roof company was not adequate. These parts might be ready at the end of this week.


The chimney is poking up above the roof line. Soon there may be heat, something I have not experienced in the past two years except in brief visits to other's homes.


I have settled on the tile for the house, having found an exdellent supplier in Portland called Pratt and Larson. Great showroom, nice people, excellent products, and some products that are close to affordable. But tiling is only in my dreams right now.

In the meanwhile, with the number one priority on hold, the subs have begun on the porch. I'm gluing up the drain-waste-vent line into its final tentacular configuration. We have been blessed with dry weather for over two weeks now. This can only mean that when the roof is ready to be applied it will rain cats and dogs for several months.


Sunday, November 07, 2004

A Farmer Is...

A farmer is many things, but often a mechanic. I got the parts for my tractor back. A rebuilt steering valve and one new fuel injector (of three that were cleaned and tested). My compact little tractor is compact in every way including how every aspect of this bulldog of a machine is crammed together. His name is "Tommy," so dubbed by his previous owners, to which I have appended, "Mow".

Early yesterday morning, in the still frigid hour before the mists had lifted and the sun was only a faint hope, I took my bucket of parts and set up a crude table under the roof of the open shed that Tommy Mow calls home. Everything was cold. Stuff that started out warm, like my tools, my hands and my feet, quickly numbed in the water logged air. As my fingers stiffened, getting the small nuts in place proved increasingly a challenge. Nothing is as cold as cold steel.

I managed to snuggle the 3 injectors into their holes, holding back the wiring harness like holding back some large artery during surgery. Once installed, the fuel hoses were clamped back in place.

Next it was on to the steering valve. The name belies its size and especially it's heft. Weighing in at some 20 pounds of delicate hydraulic valve, it is disguised as layers of steel arranged in plates like a Masterlock, yet not bigger than a large cinnamon roll. Protruding from one end is the steering column. And therein lies the challenge of extricating it or placing it back inside the dash. The instuctions call for removing the engine drive shaft to give it room to drop out, but I'd discovered that by removing a couple of dashboard wiring harnesses, and pushing the dash back, I could get it out without the complication of messing with the drive shaft.

I guess there is one other thing to relate. All Deere hydraulic equipment manuals have the picture of a finger being injected by a high-pressure break in the hydraulic line. Accompanying the image is a statement, "Escaping fluid under pressure can penetrate the skin causing serious injury. If an accident occurs, see a doctor immediately. Any fluid injected into the skin must be surgically removed within a few hours or gangrene may result. Doctors unfamiliar with this type of injury may call the Deere & Co. Medical Department in Moline, Illinois." No number is given.

Putting it back proved more challenging than removing it. I had to hold the entire, chilled weight with one arm, push the dash back with the other, and carefully thread the whole mess up through the dashboard. Once in, it sat precariously, suspended only by the threads of four bolts, while I got a nut threaded on. The front two nuts were no problem, but I could hardly get my fingers in to put the back ones on, finally getting the last one to thread by shear luck.

Once securely in place, hooking up the four hydraulic lines to its base was an equal challenge. When disassembling it, two of the compression fittings had turned the tubes they fit around into water slides and plunged down the lines and under the chassis somewhere. I'm a bit slow, so it wasn't until after this happened again that I got the bright idea to put a zip-tie around the line, below the nut so that it could only fall a short way.

I started by retrieving the two lost nuts and securing them with zip-ties. Then one by one I followed the sequence of placing a small o-ring in the downfacing side of the fitting. Then carefully so as not to dislodge the o-ring, I moved the hydraulic line over, and hand threaded the nut.

The quarters were close. In fact, I had purchased a whole set of wrenches to do this work. Truth be told, this is the main benefit of doing your own repairs, buying new tools. Among the new tools was a set of "stubbies." Special, short versions of wrenches for exactly this situation.

It is important to have the right wrenches. There is a lot of sharp, cold steel around. A wrench slipping under pressure could cause a nasty injury.

The four lines hooked up, I put enough screws back in to hold the battery tray and started it up to check for leaks. After a few turns of the motor it came to life. It sounded great, the new injector making a big difference. No leaks in the hydraulics. I raised the bucket without fluid spraying everywhere. I increase the rpm and repeated the motion. Still good. I buttoned up the rest, putting the muffler, air cleaner, and other parts back on and finally buttoning up the side panels.

I proudly rode my rejuvinated tractor down the road to the new house. Far from being a real farmer, but closer anyhow.

Saturday, October 30, 2004

A Roof of One's Own

Today was a mini-milestone of sorts. The roof, which has many layers, gained another one as the final piece of plywood was set in place.

To give the roof its sleek appearance, there is a layer of plywood that covers the SIP roof and extends 2 feet out in every direction. To support this, what would normally be rafter tails were created out of clear cedar, mounted to clear cedar headers and bolted to the side of the house in 8 foot sections. The Zoeller brothers did a marvelous job. It was more like building furniture than the way a house is normally constructed.

The outside sheets of plywood are "good one side" product called Breckenridge and stained to match the cedar. They are the visible part that overhang. Regular 5/8" ply is used on the rest. We came close to running out, and the last row of infill was a patchwork of remaining pieces.

I now feel the roof is quite leak-proof even though it is only protected by a tarp.

What next? Time to cut some holes in it. 4 skylights, a vent and the chimney. I worked on the chimney today. 20' of double-wall stainless steel that sits on a surprisingly small shelf.

After the holes and their various fixtures are installed, then the roof will be papered and finally the metal roof will be installed. Maybe by Thanksgiving... God willin' and the crick don't rise.

Thursday, October 28, 2004

Counting Crows

I had the monthly trip to Astoria today. I usually go grocery shopping as the last stop before heading home for the obvious reason of keeping the cold things cold longer. Today was different as I wanted to get home immediately following my noon meeting. Thus I went grocery shopping first, tossing the groceries into a cardboard box in the bed of the truck.

I emerged from my two-hour meeting to find that crows had eaten a whole bag of nuts and had started in on a loaf of bread. There must have been a half dozen of them cawing over my dinner including one with his face into the top of the box and disemboweling a loaf of bread. I nearly doubled over laughing. It was a scene out of "The Birds." Most of them flew away as I approached but one sat unperturbed on the roof of the cab. I think he was still there as I drove off.

Tuesday, October 26, 2004

Oh Canada

A surprising number of elements of my new house are made in Canada. Starting at the ground level and working up we have the bentonite clay foundation waterproofing system. Although I purchased it through Carlisle, a Texas company, the material itself comes from Canada.

Of course, the major portion of the house, the SIPs (structural insulated panels) were made by EnerGreen located in Aldergrove, British Columbia. But the panels themselves are sandwiched between OSB that was also made in Canada. In fact virtually all the OSB and plywood purchased for this project came from Canada.

For roofing underlayment and house wrap I'm using Tri-Flex from Ontario, Canada. The stainless steel, double-wall chimney from Selkirk, whose corporate address is 1301 W PRESIDENT GEORGE BUSH HWY, Texas, nonetheless arrived with "Made in Canada" boldly stamped on all the boxes with 50% of the carton printed in French.

I decided to use a type of plastic plumbing tubing called PEX. Much to my surprise the tubing itself was, you guessed it, made in Canada.

Although my Mora wood cookstove is not made in Canada, the only distributor in North America is in Nelson, BC. I drove up there this year to pick it up.

I will need a water purification and filtering system. Thus far the two leading contenders are from Ontario.

Even the thistle in the field is Canadian, but I tell my neighbors that when I was growing up in Canada we called it "American thistle."


Monday, October 25, 2004

Everything is Broken

Stuff is breaking left and right. The hydraulic steering on my tractor failed, spraying a fine mist of oil onto my new parking area. And because there is one hydraulic pump for the whole tractor it means nothing works at the moment. I extricated the deceptively heavy item from under the dash and brought it into John Deere for rebuilding.

My truck's fuel return lines seem to be slowly degrading in their bath of biodiesel. I have to replace them before they decide to start leaking. There may be a small oil leak from the rear of the engine block.

My little two-computer home wireless network decided it had had enough after 15 months, and has gone on strike. 24 hours of pleading and cajoling have led to no concessions. As of this moment talks have broken down completely, and I've locked it out.

One of two memory slots in my other computer died, and occasionally it won't type an "h" or backspace because the connector for the keyboard is loose. The fix for now is to squeeze the center of the laptop from the top and the bottom to reseat the connector.

My Nikon FE2 lasted me more than 20 years before I sold it and is presumeably working just as well for its new owner. My 3 year old digital takes great pictures, but it had some problems from day one and after I used it during hay bucking season I had to dissassemble and reassemble it. I'm sure it's not long for this world. A shocking lesson in the disposable nature of technology. A better camera will cost less to buy new than fixing this one.

And so it goes. Entropy 7, Marc 0.

The only upside is that not having to use a laptop as an Internet gateway means that I can use it to serve up music from my ripped CD-collection. Thus I am listening to music for the first time in 9 months.

Thursday, October 21, 2004

Night Moves (Photos)

It seemed like it might turn out to be a sunny morning from the rich colors I could see on the leaves from my bedroom window. Still, it can be deceptive in the morning if the sun rises under the clouds. When I finally hauled myself out of bed at 9:30, I could see right away from the intense light burning off the mists that it was going to start out clear.


(click for larger image)

I expected the Zoeller crew to be down working on my house; taking advantage of the break in the weather. But they weren’t there. I left a message for Jordan saying that I didn’t know how the weather was where he was at, but at my place it looked like a fine day to be roofing.

I worked on the plumbing all day. It’s very much like my favorite boyhood activity, playing with Lego. But in this case there are rules and a final test in the form of an inspection. Naturally, I was short several pieces. Well not short really. I had lots of spare parts, but they weren’t the right ones.

I’ve chosen to make the drain-waste-vent (DWV) system entirely of ABS (black) plastic piping. This choice was dictated by not wanting to use any PVC (though I couldn’t avoid it in the perimeter drain around the foundation) and not being able to figure out how to get or handle cast iron piping on my own.

Around 4pm or thereabouts, the Zoeller’s pull up ready to work on putting the last layer of decking on my roof. The day has been remarkably fine and I wonder to myself as to why they are showing up now. But they set to work and haul the first sheet of plywood up onto the roof. As someone paralyzed by heights, watching these two work as a team to manage large, awkward loads up a 7 in 12 (30 degree) slope is spell-binding.

They barely get the first panel in place when they are called off to go herd some wayward cattle (not theirs) back home. They return at dusk with flood lights in hand. Parking their truck at the top of the driveway and pushing the front wheels up onto a load of gravel, they are able to shine the head lights on the roof.

They work this way until they are just one panel away from finishing the southern and highest row, when the rains start. Wisely, and much to my amazement, Jordan orders his brother to start packing it in for the night. I was surprised that he didn’t try to push to complete the row. It’s 11pm by the time they unfurl the 1000 square feet of tarp back over the roof to protect it from the rain.

I can’t wait to go take a look at the results in the morning. It will finally start to look like a building with a roof.

Tuesday, October 19, 2004

Working Under a Tarp

For the past year and a half I have been protected by tarps. The manufactured home I live in is on its third set of tarps. My new home is under two, new, blue tarps. And I have tarps over a number of piles of lumber here and there.

Tarps as an economy roof of sorts are a fixture of existence in the country. It is important to distinguish between temporary uses like the one on my new house, from long term use as a substitute for a new roof like the one at my current shack. Of course, sinking a few hundred dollars a year into tarps (and blue ones only last a year here) is a pretty cost effective compared to putting out $5,000 or more for a good roof.

By far the most oft tarped structure is a trailer or manufactured home.
I've often wondered why the tarp companies don't make the tarps in roof patterns. I imagine a tautly drawn tarp roof with the patter of shingles or adobe clay tiles would look almost indestiguishable from the real thing. Especially at high speed in a car, and only glimpsing it through the untended yard.

Really it should be agains the law to sell a manufactured house without eaves for use in Oregon. Like my current home, the water runs down the outside walls and destroys the flooring and structure of the dwelling. Smart people put a second roof over the first right away or else maintain them impeccably.

The tarp on my new house admitted 3 gallons of water last week, but the crew refitted it and there was barely a drop in there after the storms of the last few days. The iffy weather has not admitted to any roof time, and it's about to get worse with the possibility of snow next week.

I've learned (I think) that if one is going to put tarps on for longterm use, the best strategy is to put two on at once, one atop the other. In this way, when the first tarp gets destroyed by sun and wind, it will still be able to act as a shield for the good tarp underneath. Once a tarps weave opens up, you might as well be using cheese cloth. The ones billed as heavy duty (often brown on one side, silver on the other) do last longer. I have 3 that are on their second year. I've also put the brown side facing up on my roof in a desperate attempt to achieve some level of solar heating this winter.

Meanwhile I'm working on the interior, roughing in the plumbing and framing the rooms. If we get a break in the weather, I think it will take a few days to put the next layer of plywood on the roof. After that it will take several days to cut the holes in for the chimney, vent and 4 skylights. Finally there would be putting the roof itself on.

After that, the doors and windows would need to be installed before I'm ready for winter. I figure that should be no later than Christmas.


Wednesday, October 13, 2004

Turning Old Wood into New

October 13, 2004

Another stunning day. I planed down more wood that will be the living room, bedroom and den floors. 2” thick, 8” to 12” wide fir planks. Many of them so covered in grime and oil I’ve taken to leaving them out in the rain to wash off. My new Delta 13” planer is a miracle tool. Stick a piece of 50-year old, scarred wood in one end, and fresh lumber comes out the other. Actually it’s better than fresh lumber. While not old growth it certainly has more character, is straighter, and even with the bits bugs have taken out of it, stronger than modern wood. There are the holes and black iron stains from old nails, and the characteristic patterns indicating that they came from big trees. And few could afford to line their floors today with 1.5” x 12” planks of solid wood.

As great as my Delta planer is, it struggles with 12” lumber in its 13” maw. I struggle too, because most of the planks are 10-foot plus and a few at 16 feet. The planer can at best take off 1/16th of an inch at a time. I’m taking off a half inch or more. That means a minimum of 8 passes. The bigger planks can really only go 1/32nd at a time or up to 16 passes to get them into shape.

The blades for the planer are $35 a set, and last through about 16 planks or so. I learned the hard way not to use the planer as a cleaning tool. The grit in the floor dulled a set of blades in one pass. Now, in addition to combing through each plank to remove nails and bits of nails, I wire brush the surface first. The whole process takes up to one hour per plank. I have perhaps 20 planks done and I need 20 more.

It is great being outdoors all day doing this, but it is fatiguing, noisy and dirty work. The planks need to be supported at input and output and I do that manually. Yes, I should set up rollers. Thanks for the suggestion. The tops clean off in a pass or two, but the sides remain filthy and within a few passes the tops of my jeans and the belly of my shirt are covered in grime.

There is a pile of shavings that stack up at the foot of the table on which the planer is mounted. So far I’ve just spread them around in the immediate vicinity, but I may have to start bagging and transporting them elsewhere.

It’s all worth it. The wood is heavy, straight and full of character. Before it becomes my floor it will need to have it’s edges trimmed, perhaps tongue-and-grooved, set in place, nailed, sanded, and then finished. I’m likely to top nail it with a can of old square-head nails that one of my neighbors retrieved from a dark corner of his barn. It’s a generous gift. The old nails sell for 25 cents a piece in town.

I now own a 500W work light and have started to putter around in the house after hours. This is extending the work day, but unless I get shut-in soon, I’ll likely be driven out by the cold. The Z-brothers returned today with the east and west tines. The got half of them on the building, but needed to make an adjustment to the eastern edge before proceeding. The weather is expected to turn nasty on Saturday and they won’t have the next layer of roofing on by then so we will have to batten down the hatches and await clear weather before continuing further.

Monday, October 11, 2004

Home Depot v. Lowe's

I got a late start, but finally went on another epic journey to town. This time only Hillsboro, about 2 hours away. My main quest was for plumbing supplies and more lumber. There are 3 Home Depots in the area, including the one I prefer on T-V highway in Hillsboro. There, along a natureless suburban collector road with strip malls on one side and light industrial and warehousing on the other, is a Home Depot and Lowe’s sharing the same former farmland. They have connected parking lots with a mere 100 feet of pavement separating the two behemoths.

I was once accosted in the parking lot by a shopper carrying a bag, who exclaimed, “this is great. Just go to one store and get a price and take it next door. They won’t be undersold, so they give you 10% off the price of the other guy.” Then he showed me some tool that he’d probably saved an extra $3.50 on.

I usually shop at Home Depot just because Lowe’s feels too expensive. At Home Depot everything is in a state of controlled chaos. It’s clear that the personnel have some other agenda than helping you. It seems to be the choice of others too, and there are always lines at the paint counter and the registers. Parking is more difficult and sometimes even getting a cart.

At Lowe’s even the most mundane electrical parts are stocked like a department store display case. It’s serene inside, well lit, and nicely organized. While I was there one employee was restacking 2x4s into an ever so neat arrangement. Everyone asks you if they can help you. Lowe’s must have plenipotentiary mystery shoppers who are empowered to fire people on the spot if they fail to acknowledge a customer.

Because I was shopping for bathroom and kitchen faucets, I checked out Lowe’s first. I spot checked the quality of their neatly displayed lumber and their prices. There fixtures display was impeccable and at eye level. I’m sure I was asked if I needed help 3 times just on my way in. I looked over several models and then went to Home Depot.

Home Depot was its predictable self. The lumber looked awful and was going to need a lot of picking over. The prices were within pennies of being the same. Their bathroom display was a mess. There racks were up high, making it impossible to actually touch most of the products. And Lowe’s seemed to have what I needed. I grabbed a couple of things that I could only get at HD, and left for Lowe’s.

My first stop was lumber. I passed by the line-less contractor checkout, staffed by a small Asian women who appeared to be looking for things to do. They had everything in good shape except they were down to their last gnarly 2x8x12s. I mentioned this to the young man staking 2x4s and within a few minutes the aisle was blocked off and a new block of lumber was forklifted into place and unwrapped.

I stood at the ABS plumbing fittings display for about an hour, drawing in hand, picking out pieces for my drain, waste, vent (DWV) system. But they had every single thing and every item was in the right bin. Something I’d never experienced at Home Depot.

When I went looking for a work light a quick question to an employee (who, by the way, promptly interrupted a conversation with another employee to attend to me) got not just directions but an escort to the right spot and a pointer to an alternative fluorescent model that was actually what I was looking for.

I made my way back to the contractor checkout with my two carts. I don’t think anyone had checked out at the contractor aisle since I’d entered the store. The Asian woman’s badge read, “Toshie.” Her fluency was not very good, but in the amiable, service-oriented way of the Japanese, she began to methodically scan my order. Her inexperience showed at once. Veteran and harried checkers at Home Depot often find one good tag for an item, lock onto it like a top gun pilot and squeeze the trigger repeatedly at that same tag until they reach the number of like items one is buying. Toshie was counting them up and then scanning one, walking back to the cash register and then checking to make sure that it had registered.

I was in no hurry and there was no line so I was more amused and bit in disbelief that Lowe’s would place such an inexperienced person on their contractor counter. And then again, what was an older Japanese woman doing working a cash register there anyway? A good story untold no doubt.

The bar codes on the ABS tubing proved entirely unscannable and the computer didn’t seem to able to generate a discount on the bulk items I’d purchased. Somewhat reluctantly, and at my urging, she called for help. A swarthy young man was there before the receiver hit the cradle. With a few short keystrokes he was able to determine that the discounts would only show at the end. Then he patiently read off the numbers for the pipes. We were back in business.

Then it came to count a whole shopping cart load of plumbing connectors. I shoveled them from one cart into another as Toshie scanned them.

“Toshie-san wa Nihon-jin des ka?” I asked using the few words of Japanese I know.

Astonished at first, “Hai,” she replied. “You speak Japanese?”

“Skoshi Nihongo o hanashte imase,” I rattled off the canned expression. “I worked for Mitsubishi-denki for awhile.”

The black plastic parts continued to race by interrupted only by the confirming beep of the scanner.

“Oh, Mitsubishi-denki. Big company.” After a pause. “So many pieces?”

“I’m building a house.”

The basket was emptied and I was finally ready to pay and go.

“Domo arigato.” I said.

“Do itashimashte.” She replied.

I loaded up my rig and drove off into the sunset.

Sunday, October 10, 2004

There is a First Tine for Everything (Photos)

The mist lifted off the Nehalem River Valley to reveal a lovely, fall day. This after downpours yesterday. Despite the tarp over the house more than 3 gallons of water leaked in. I know because I set up a sort of flume to catch water along one seam and funnel it into a 5-gallon bucket.

Jordan and Jason arrived with a truck full of roof pieces that I have referred to as tines, prongs, outriggers, rafter tails and "my crown of thorns". They are what rafter tails might look like if I had them in my roof. But since my roof is all foam, there isn't anything that could stick out to form an eave. That is except the 10" thick panel itself. But I didn't want the house to have the look of a big, thick slab of roof sticking out so I formulated a plan to bolt on these tines and then put another layer of plywood out over them to form a roof that appears to be 1" thick.

Here are links to some pictures to show you what I mean

The house is to be clad in barn wood salvaged from the barn and shop that I tore down last year. I sorted throuh the pile of wood today, but in the process evicted 4 little squirrels. My mom's going to be very upset about that.

Today I had 7 visitors stop by and chat. Yesterday I was indoors and I don't think I talked to anyone all day.


Saturday, October 09, 2004

Rainy Day

It's pouring here. I have two homes now, both covered in blue tarps and both leaking. The trailer is leaking right over the toilet, which is handy for refilling it but not for using it. The porta-potty I got for the work site has been the best investment. Even my mom remarked on how nice it smelled, which is more than she has said about this house or me for that matter.
The two young builder-brothers have been off working on a deck project and have only spent a few days in the past month at my place. It's a bit infuriating, but not much I can do at this point. They expect to be done and working on my place full-time starting Sunday. Still, it means that they will be working up high in the wet when they could have done this project first and then done the deck later. Not sure how that worked out.
I've been working on the interior framing, which is darn near done after only a week. I've started designing the plumbing system, which needs to go in next. With any luck I will have a real roof over the place, the plumbing and the electric by Thanksgiving.