Monday, December 19, 2005

Passive House Performance

The house is performing well. During a recent cold spell, the house would drop from 70 F to 62 F overnight with no heat source despite exterior temperatures in the 18 F range. I'm heating with wood scraps left over from construction. Mostly cedar. I estimate I could heat the house with one cord, and certainly not more than two cords in a season. Other houses of similar size in the area might use up to 8 cords of wood a season.

The passive solar element has also had a workout. With a cold snap with clear skies, I've had the house heat up from 62 F to 68 F with out any heat input other than the sun.


The roof angle is 30 deg., the winter solstice sun angle. Shown here the noon sun from
the four upper windows casts light on the concrete panels. Heating them so they can
radiate heat later.

The house is also nice because the heat is uniform, no blowing vents, and there are no drafts.

Pantry


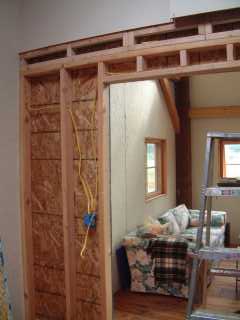
The pantry is to be fitted between studs in the kitchen wall.


Framing is made from old cedar and treated with linseed oil
giving it its dark patina.


In keeping with the open plan of the house, the pantry is open
and accessible.

Monday, December 05, 2005

Saturday, October 29, 2005

Solar Power: Step 78

Step-by-step, one small piece at a time the system comes together. The special quick connects came in, but one wire ended up too short, and so I have another on order. Nonetheless, the panels all were producing 70 volts per series pair. They are now wired into the DC breaker panel.


The panels covered for safety. There is no way to turn them off, so
when the sun shines they are "hot" and can potentially cause a shock.

I needed help to raise the panels and put the legs on. In theory, they will not have to be touched for 20 or more years. Panels are quite inefficient converting only about 10% of the power that hits the panel. In 20 years I'll bet 2 panels of this size will replace the 10 I have now.


The panels up and working.


Inside the electrical shed work continues. The inverter weight 66 pounds. I had to build a shelf to place it on while I bolted it to the wall. All that remains, I think, is one solar panel connector, two battery cables and wiring it into the AC side.


The inverter (left) installed, and awaiting twocables coming from
Apache Junction, Arizona.

Wednesday, October 19, 2005

Final Failure & the Simpsons

I told the inspectors I wouldn't be back until Wednesday afternoon, but when I arrived I found 3 yellow sheets of paper stuffed in my front door jamb. I failed my final inspection on 3 counts.
  1. The inspector couldn't enter the building.
  2. There needs to be 3' of flat runnout at the bottom of the stairs, and some of the gravel had sunk down a bit.
  3. Lack of adequate hold-down on the porch roof.
Items 1 and 2 could have been handled had I been there. In fact there is nothing left to approve inside, but the inspectors have every right and are naturally welcome to make sure they caught everything. The reason I know that there is nothing left inside is that I had a final inspection 3 months ago in order to get occupancy and at that time there was a list of items to complete: front and back handrails, porch lights, finish siding, and a couple of little nits. Nothing about the porch roof structure, which was finished at that time.

Frankly, I've worked hard keep from using Simpson Strong-Ties in visible locations. The reason being that most of them are as ugly as sin, and meant to be used inside walls and covered over. On an exposed structure like a porch they really can detract from the look. Their popularity stems from the combination of increasing code requirements and cheaper construction methods and materials. Use a Simpson Strong-Tie and everyone is happy because the burden of failure falls on them. It's a CYA sort of thing.

I was delighted when my first final list made no mention of additional hold-downs on the downhill side of the porch roof. The engineer had made much of the uphill connection at the house, but was silent on the lower portion. In the absence of direction my builders had fastened them with a single #10, 4-inch, stainless steel deck screw. My real frustration at not being there for the latest final inspection was that I might have been able to distract him or at least point to the last inspection report and kept the focus on those few items.

When I described the whole situation to my octogenarian neighbor, Roxy Nelson, he laughed. He had commented to me long ago that he thought the roof was liable to blow off in a stiff wind. As a machinist he had used plenty of metal in his place, and he was skeptical about my solution.

I did finally look up some data and the likely uplift on each rafter is 350 pounds. Trying to find the pull-out resistance of the screw was more difficult, but it seemed clear that 350 pounds was a stretch. Moreover, it seemed clear that the real point of failure would be the screw pulling through the cedar. So, in the end the house may be uglier, but safer.

Monday, October 17, 2005

Solar Panels (photos)

Today I finally got to put the panels up...or rather down. The rack system I bought from Uni-rac, "the leaders in the industry," but it had some issues. The panels have legs to raise them to the requisite angle, but it's not really possible to install the panels on the raised rack. Here's why:

  • The panels themselves provide the third arm of the triangle. Without the panels in place there is no real frame. A catch-22. Can't install the panels on the floppy rack. Can't make the rack stiff without installing the panels.
  • The panels clamp from the top using special clips. The panels must be held in place to install the clamps.
  • The clamps between panels hold both panels and thus two panels must be done at one time.
After trying to do this at an angle, I gave up, layed the whole mess down and installed them easily in minutes.


A rack of solar.

Every time I turn around I find I need another specialty part. Most recently I opened up to find the panels have specialty, quick-connect electrical cable pre-wired. Quick if one has this kind of cable around. I don't. It's now on order.


The panels look diminutive because the electrical shed is 10' tall at
the face. The panels are 3' x 5' each and the two racks together is
about 30'. The panels weigh perhaps 30 lbs. each, so I'll need help
raising them.

Friday, October 14, 2005

Adding DC (photo)

I've started working on the solar system. It's not really a good time of year to be doing solar, but I've had the panels for over 2 years now, and I'm interested to put it all together. Besides, it does add a battery backup component, which is a good thing to have during winter storms.


On the left (gray boxes) is the AC side. On the right is the start of the
DC (solar) side.

Monday, October 10, 2005

Exterior is Finished (photos)

There was a bit of a delay waiting for new cedar planks to cover the back wall. We ran out of salvaged, cedar barn planks, but it was amazing that we got 3 sides done in old wood.


Jordon (top) and Jason put the final plank in place.


The back (north) wall gives a sense of what the house would have looked
like if it had all been done in new wood. Dull, uniform, and lacking in
character.


The final house with its back to the north wind. It was a conscious
choice to have no windows (only skylights) on the north side.

Saturday, October 01, 2005

First Bread (photo)

It finally got cool enough to try baking bread. The results were quite good, but the house got quite warm.


It takes a small inferno to get the oven to 450 F (Photo: Alice Brawley-Chesworth)

Wednesday, September 07, 2005

Made in the Shade (photos)

The south porch is covered.


The house looks like it has been there for 40 years.


Extreme eastern view.

Monday, September 05, 2005

Ready for Final

I finished installing the front and rear porch lights and the rear handrail. This completes my tasks prior to final inspection. As soon as the porch roof and siding are done, I will call for final inspection. Even though I've been living in the house for over 6 weeks now, completing these last couple of items was a big relief.

Friday, September 02, 2005

Getting Closer (photos)


West side complete.


South face nears completion.


If you squint you can see the finished house.

If It Weren't for Re-work... (photo)

I like it in the dark, ask any of my friends. That's why I hadn't really planned for front and rear porch lights. I thought I would put them in after final and after some experience living in the house. No dice. Front and rear lights are required, I think because of the associated stairways.

Thus I was forced to tackle the problem early. It involved removing a couple of panels and figuring how to get to a switch for the rear light. The front one will be automatic with a motion sensor, and a manual override in the attic. Should be complete tomorrow.


New switch for outside light..

Wednesday, August 31, 2005

First Upper Window Framed (photo)

Progress continues. It looks as if there is enough salvaged cedar siding to cover the west, south and most of the east sides.


Board-by-board the exterior skin spreads. .

Monday, August 29, 2005

Stair Rail (photo)

Among the handful of items needed to final the house is the need for "grippable" handrails. The grippable standard is pretty tight, and the 2x4 top rail on the stairs didn't cut it. So here is my solution.


Round rail meets code.

Tuesday, August 23, 2005

Porch Roof (photos)

Hay season is over and the porch roof starts. It is made from the aluminum roofing salvaged from the nearby barn that we dismantled 2 years ago. Looks like we have plenty of material. Combined with the old siding the house has a weathered look as if it has been on the land for years.


Jordan and Jason confer..


The first section of porch roof nears completion.

Wednesday, August 17, 2005

Work Resumes

Hay season ended and work resumed on the house.


Jordan places a board up high..


Jason cuts a board while Jordan takes a break.

Wednesday, August 10, 2005

Water Shed (photo)

Around mid-July hay season began and work on the exterior of the house ceased. In the meantime I did more work on the watershed, completing the exterior paneling and framing up two of the four barn-style doors.


Water shed as it sat for over a year.


The water shed (background) missing a door

Tuesday, August 02, 2005

House at Dawn (photos)


View from the deck at sunrise.


Morning light in the living room.

Friday, July 22, 2005

Day Two: Coffee

I arose this morning to the sound of rain. Padded across the wood floor, over the tile and into the kitchen. I lit a fire in the stove, and threw in a few chunks of wood. While the water heated up, I ground coffee by hand in the coffee mill. About 30 minutes later the coffee was perking, and soon after I had my first cup of coffee accompanied by English muffins toasted directly on the stove top.

It's all good.

Fang Moves (photos)

I carried him by hand in the cat carrier the 200 yards to the new house, and set him down in the living room. He quickly emerged and checked the permiter several times, howling all the while. He returned to his cage as if it were some magical portal, and if he only went through it again, he would return whence he came.


Fang quickly finds a sunny spot.

After a while I left him. When I returned he was sleeping on the bed. It will take him some time to adjust, but it's a far, far better life for both of us.

Wednesday, July 20, 2005

First Night

Today I got a verbal okay to move in. There is a short checklist of items to complete before final, but for now I will never sleep in the old manufactured home again.

It's a year and one month to the day since groundbreaking, but really over two-years since I embarked on this project.

I celebrate by spending the evening on my new porch. For an instant I thought I saw a forest fire or an emergency vehicle in the opposing hills, but it was only the moon's big orange face rising through the fir trees. I watched him ascend as I sipped some fine Portland whiskey. The silhouettes of a few deer moved across the lawn not 30 feet away. I stood for a time at the deck rail. I could hear their munching as they pulled on the new growth. After the moon had risen in full, and his face calmed to luminescence, I retired, snuggling under the layers of down, the clean night air rushing over my face, and the moon shadows projected on the ceiling high above me. The house snaps and creeks as the timbers cool and gain moisture. A new house with old bones telling stories of another life.

Tuesday, July 19, 2005

Clean Water

Today I found out that my water tested potable. I'd been drinking it for a week anyway, after having shock treated the lines with chlorine and then activated the UV light. You've got to have faith.

Always willing to try new suppliers, I chose Coffey Labs in Portland lab instead of the usual one used around here, Alexin. Maybe Coffey is used to dealing with professionals who don't need a lot of hand holding, but if they are going for home testers, they need some work. First they forgot to send my bottles, and I had to email and remind them a week later. Then the test bottles they sent came in a makeshift box, with a foam liner. No testing protocols were given, other than to keep the samples chilled in ice during the trip back. They didn't even include a return address label.

Despite all this, I managed to get my samples double-bagged and sent overnight, apparently without leaking, and arriving at the required temperature.


Friday, July 15, 2005

Main Floor Complete (photos)

Finished with a 4:1 mix of linseed oil and turpentine.


View from above.


View from above.


View from above.

Sunday, July 10, 2005

Bedroom Floor Complete (photos)

These photos don't convey the amount of color variation in the boards. They range from a red like redwood, to as dark and smooth as walnut. They are all quite distressed, especially on the outside wall edge with plenty of worm holes. Not much sign of termites or powder beatles. I wonder if I'll hear chewing at night?


View from above.


All but one of the planks is 12" in width.

Thursday, July 07, 2005

Making a Floor Plank (photos)

The flooring I've put down thus far came from the shop and the process of recovering them is already detailed in one of my blog entries. Planing a board down that much (1/2") to dimensional size is hard on the equipment, inefficient and time-consuming.
Most people are familiar with the handheld box planes used to shave a few curls of wood off of a door edge to get it to fit. Even then, depending on the wood, it can be quite an effort. One would never use one of these planes to true-up the surface of a board. Along comes industrialization and the marriage of very sharp blades with high rpm motors, and all of a sudden it's possible to "plane" off the surface of the board. About all it has in common with hand planing is the name and the idea of removal of material in small increments. Otherwise they are totally different.


Barn planks trimmed and loaded on their way to being re-milled.
This is perhaps only 200 square feet of flooring. It takes up a lot more space and
weighs significantly more than a laminate or pre-finished floor.

It was hard enough to plane down the shop boards, but the boards that were in line to be used next came from the old hay barn. I'd only taken up a third of the flooring, and this portion was in the feed stall area. The boards were fascinating. Along the edge of the manure trough the boards had been contoured like some irregular Lilliputian coast line. The wood planks had started out 2" thick, but at the "ass" end they had been smoothed down over the years to 1-1/2" or less. The knots, being much tougher, remained uneroded, near their original height. I was taken by the gentle, natural looking undulations in the surface. It occurred to me that they would look great in the loft, where I could polish up the edge, place it facing the living room side and leave it exposed. It would be unique in my experience and a tremendous tie to the former structures. For this purpose I had removed the planks and labeled them so that each edge would line up with the matching neighbor.

Parenthetically, I used Roman numerals to designate the boards. I was forced into it by having only a nail as a marking tool. It was easy to see why early numbers were so linear in form (I, V, X, M). It's easier to mark in wood and stone with primitive tools than, 2, 3, 4, and 5 are with a Sharpie.
Unfortunately the pile of lumber had these portions on top, and so I was forced to cut the tails off to make regular floor boards. Still, I might be able to achieve some of this effect with some boards that have these features on their entire length that I have set aside.


The pile of lumber had been sitting for a year under a tarp. It was "stickered" meaning it had sticks between each plank to allow air to circulate. There must have been around 50 planks in the pile. When I removed them they were dry as a bone. Much drier than the shop planks that although kept in the basement, were not stickered and were substantially wetter. In spite of this, these planks weighed quite a bit more. They were all in the 12 to 14' length range, shorter than the shop planks, but there were more 12" wide ones.
Since these were in the "manure rich zone" of the barn, they were themselves manure caked. The drying process helped dry this too, but there was still a lot of organic matter on the surface. This kind of debris in the top layer dulls planer blades in a few passes. This along with the knots, and their general hardness could cause me to run through $35 sets of planer blades pretty quickly.
All-in-all the way to go is to have them remilled. That is, cut with a band saw to remove nearly all the 1/2 inch at one go, then planed just once. I don't own a band saw, so I arranged to have Tyler Bond, the person who has cut all my cedar for the deck, to do it.


Planks after milling.
In the meantime I spent the day pulling them off the stack, trucking them back to the house. Cutting off the bad ends to about 8' in length, removing missed nails and running some really bad edges through my table saw to create a new edge. If all goes well, the bedroom will be made up of thirteen 12" planks, and the den made up of more random widths. But the planks will span the whole 8' with no other seams.


Planks lined up for selection.

One of the things I'm most proud about in the house is the paucity of unusable construction waste. To be sure, there are a lot of wood trimmings, but I intend to burn most of them, and re-use the larger bits. Still, managing where to put all this material is daunting. Especially the salvage lumber. Simply trimming a couple of feet off some 2x12s leaves a pile of lumber that has to be stored neatly some how. This has proven a big challenge, one I've not yet mastered. The piles of such debris from the barn razing last year are now becoming impenetrable blackberry thickets. Turning them into neat cord-stacks of future firewood will be a project in and of itself.

Monday, July 04, 2005

Bath Door & Back Stairs (photos)


These stairs are as steep as legally possible in Clatsop County.


The bathroom door is 28" wide made from fir and old-growth cedar.
Finished with boiled linseed oil.

Porch Views (photos)


Floor Show (photos)

The flooring is started. It is the floor salvaged from the shop on the north east corner of the property that my brother Paul and I took down two years ago. The planks are 8", 10" and a few 12" in width, and up to 16-feet long. I planed them down from 2" thick to 1-1/2". If I had it to do over I would have them milled in half, yielding two 1" planks and exposing the cleaner center. The floor looks great, but I could have used twice as much flooring.


The floor is top-nailed using traditional "cut" nails salvaged by Pat Cahill..


Mostly fir with what I think are a couple of spruce boards.


The floor is put together using a biscuit or plate joiner. A very cool tool.

Wednesday, June 29, 2005

Barn Boards Begin (photos)

The house starts to take on it's final look as the board and batten is applied. The boards are 1-inch thick, old cedar salvaged from barns taken down two years ago on the property. The battens are new, and we likely won't be able to cover the whole house in old cedar.


Jason decends the stairs after putting up another board.


PIt's all coming together. The house presents many unusual details to the viewer.